"Barnacle" Fingerless Gloves
"Barnacle" Fingerless Gloves

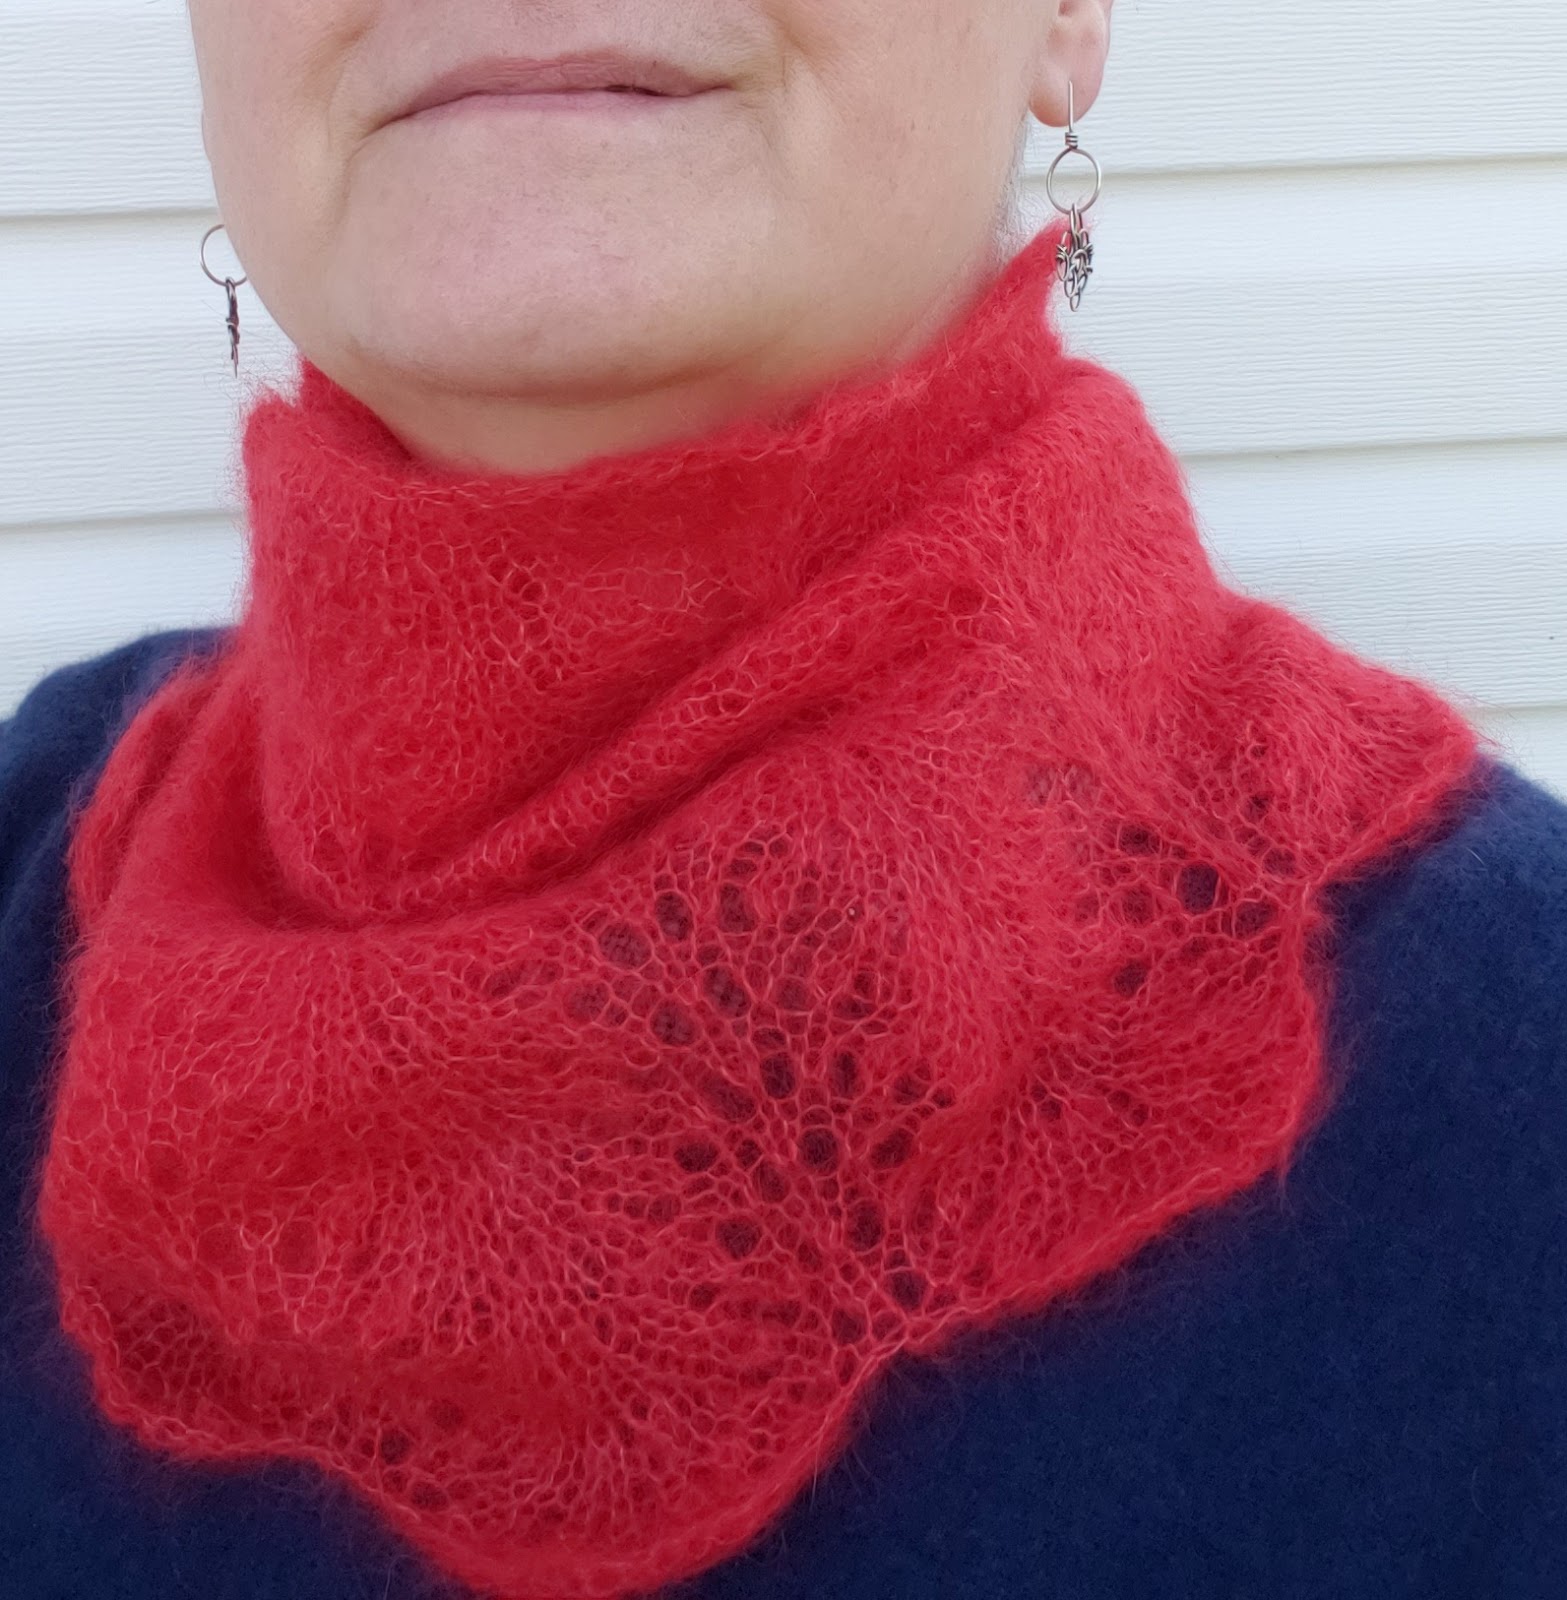
Carrying on with the barnacle theme (also known as a mock cable ribbing), I wanted to make myself a longer pair of wrist warmers.
.jpg)
In the 1960s, I was a little girl and was utterly fascinated whenever my mother got ready for a more formal event. I recall one in particular where she wore a long dress and elbow length gloves. I was besotted by those gloves! I thought she looked like a princess.
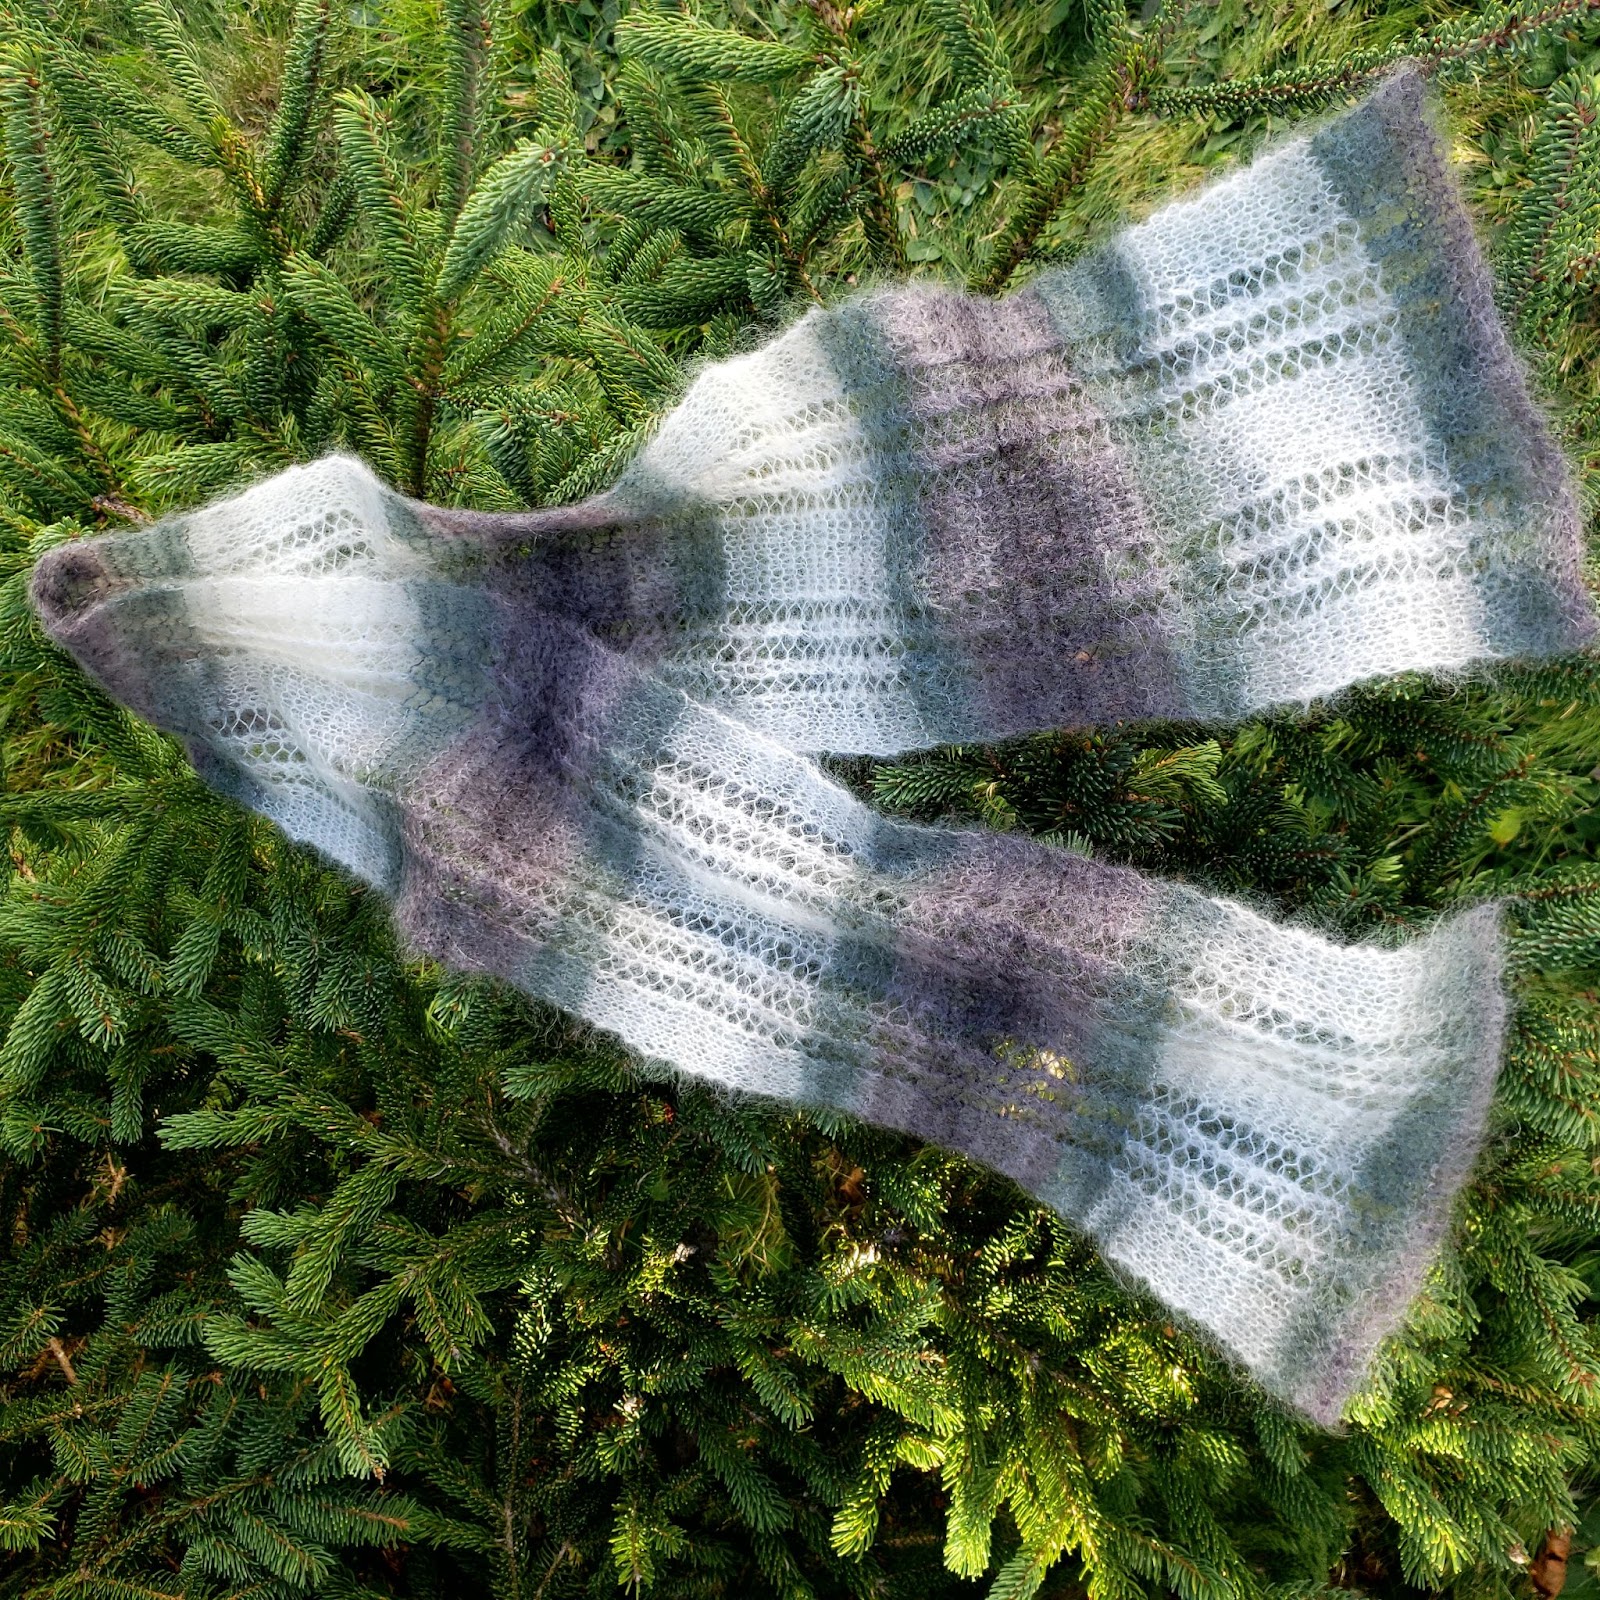
As I approached my 60th birthday I made myself a promise to embrace my inner princess more often and decided I just must have a longer pair of fingerless mittens. As these were knit in mohair/silk and are quite warm, I opted for a forearm length. The beauty of this pattern is you can make them as long or as short as you wish.
This pattern has the potential of being a stash buster as well. There was 38g of yarn in my sample (17g per ball). You could theoretically use a partial ball (18g or more) of laceweight as a main color and then work smaller amounts in as the second strand. This could be done systematically by winding off pairs of small balls of contrasting yarn; or by being completely organic as it comes out of the stash basket!
In any event, two balls of Berocco Aeriel will give you one very long pair of fingerless gloves (mine are about 13 inches long unstretched), with plenty of each ball leftover to go towards another pair. If you don't have any laceweight yarn, check the sale bins at your local yarn shop as you only need two complimentary colors.
Note: my patterns are posted for free without annoying advertising pop-ups. I do this on purpose as some people are intimidated by aggressive advertising, and I want my patterns to be available to everyone. If you are in a position to show a little appreciation for my work, consider buying me a coffee ☕️ using the link on the home page. If you wish to knit items for sale using my patterns, please credit me as the designer and do not underprice your work!
Materials
For this project you will need:
- 2.75 mm double pointed needles (at least a set of 4)
- two balls of laceweight yarn. I had two complimentary skeins of Berocco Aerial in my stash (one in Silver and one in Lagoon). You will hold the two strands together throughout. Conversely, if you've got a favorite skein of light fingering yarn, it may also do the trick.
- tapestry needle to darn in the ends
- small scissors
- notebook or app to keep track of what you are doing
Gauge: 6 stitches and 12 rows to the inch in pattern
Pattern adjustment considerations: The mock cable rib I've dubbed "the barnacle stitch" has a lot of stretch in it. Please take the time to knit a decent size swatch to confirm your gauge and to check how much stretch you get. This will help you decide if you want to make the same size I did, or wish to scale up or down.
As the pattern is a four stitch repeat, you will want to go up or down in multiples of four stitches. I cast on 48 stitches. After having worn mine several times, the forearm section is 4.75 inches in diameter while just below the base of the thumb is 3.25 inches in diameter, but the stitch count remains the same throughout.
If you wanted to make a slightly smaller pair, you might try 44 stitches or 40. Conversely, if you need a larger size, you might try 52 or 56 stitches. Again, how much your swatch stretches is important here as you can take advantage of it. Stretching the fabric a bit is preferrable to having the work seem baggy around your wrist.
My suggestion to you is measure the widest part of your hand as if measuring for gloves and then measure where your gloves will begin on your forearm. The number of stitches you cast on must accommodate these two widest points. The pattern starts at the forearm and works down to the hand, so after you've done a few inches, slide your work onto a narrow circular needle of piece of scrap yarn and try it on your arm. If you need to start over with more or less stitches, now is the time to find out!
Pattern
Cast on 48 stitches on your set of 2.75 mm double pointed needles (16 stitches per needle). Join in the round taking care not to twist the work.
Tip: I cast on one extra stitch and slide it from the end of the third needle onto the beginning of the first needle. I then work that stitch with the first stitch together. I find this helps reduce the gap between the first and last stitch in the round upon joining.
Rounds 1-4: Work (k2,p2) from beginning to end of each round.
Begin mock cable (barnacle stitch) pattern:
Round 1: Work (k2,p2) to end of round. (48 sts)
Round 2: Work (k1, yo, k1, p2) from beginning to end of round. (60 sts)
Round 3: Work (k3, p2) to end of round. (60 stst)
Round 4: Work (sl1, k2, psso, p2) to end of round (48 sts)
Continue in pattern until you are close to the length you need to bring you to the base of where your thumb is. (In my sample, I completed 25 repeats of the mock cable pattern beyond the four rounds of ribbing.)
As you complete Round 4, do not purl the last stitch. Instead, slip it the beginning of your first needle, and then turn your work. To make the slot for your thumb will require you to knit back and forth from the first purl stitch to the last purl stitch in the round.
Working back and forth will change the stitch pattern slightly.
When you first turn to work back across, you will be working on the inside of your glove or the wrong side (WS). You will complete as many 4 row repeats as needed to make a slot large enough for your thumb. I did 5 repeats.
Row 1: (WS) Work k1, (p2, k2); repeat to last 3 stitches, p2, k1 Turn.
Row 2: (RS) Work p1, (k1, yo, k1, p2); repeat to last three stitches (k1, yo, k1, p1). Turn.
Row 3: (WS) Work k1, (p3, k2); repeat to last 3 stitches, p2, k1. Turn.
Row 4: (RS) Work p1, (sl1, k2, psso, p2); repeat to last four stitches (sl1, k2, psso, p1). Turn
Rejoin your work into the round to begin your next pattern repeat. From this point, to the end, you will be working on the right side of the work.
Tip: at the beginning of row 3, knit into the front and back of the first knit stitch. As you complete row 4, slide the first purl stitch from needle number one back onto your third needle. Knit it and the last purl stitch together to help close the gap. Your round will now begin with knit stitches and end with purl stitches as it did in the beginning.
Complete 5 more repeats of the 4 round pattern stitch (20 rows in pattern).
Round 1: Work (k2,p2) to end of round. (48 sts)
Round 2: Work (k1, yo, k1, p2) from beginning to end of round. (60 sts)
Round 3: Work (k3, p2) to end of round. (60 stst)
Round 4: Work (sl1, k2, psso, p2) to end of round (48 sts)
Then complete four rounds of k2, p2 ribbing.
Cast off loosely in ribbing. Weave in your ends.
So get your needles out and get your inner princess on! If you have any questions about this pattern, please contact me at theknittedraven@gmail.com


Comments
Post a Comment